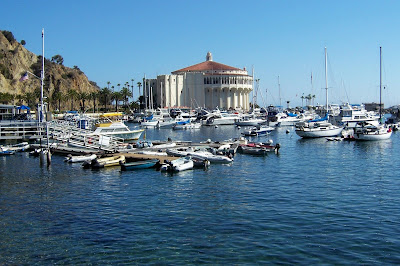
Ahhhh, Avalon. Just an hour's boat ride from downtown Long Beach, and there you are, in one of Southern California's gem's, Avalon, Santa Catalina Island. Catalina, as it's commonly called, is one of Southern Cal's Channel Islands and the one that is closest to the mainland. We found ourselves here on a recent long weekend for some sun, kayaking, relaxation, and of course, eating! We discovered some good, basic, home-style Italian cooking at Antonio's Pizzeria and Cabaret, an oceanfront restaurant that boasts a large menu of what I would say is Italian comfort food. Known for their pizzas primarily, Antonio's has a bit of that throwback, hippy feel to it. We treated ourselves to an early dinner there, sitting out in their rustic patio overlooking the water. My boyfriend and I decided to share the spinach and Italian sausage calzone and a minestrone soup. Service was friendly and fast. The calzone was baked nicely with a bit of crispiness on the outside of the dough. Inside, the spinach, sausage, and cheese melded deliciously and the bread 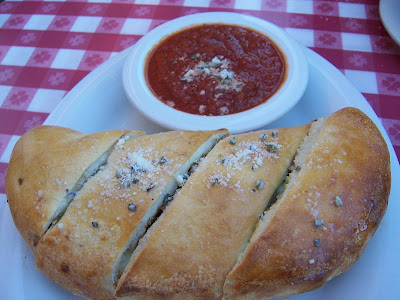

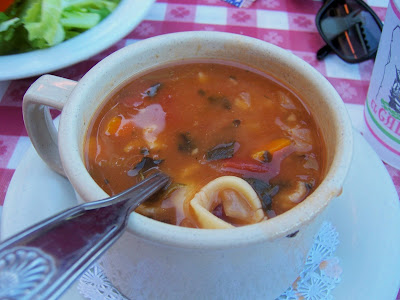
was warm and soft. I especially liked slopping up the calzone with the tomato meat sauce that was served on the side. The minestrone soup, though a little bland, was hearty and full of good things like potatoes, pasta, and veggies. I think it could have used a bit more seasoning to it but
seemed to hit the spot. We liked Antonio's for their homey food, great service, and especially, the gorgeous seaside views. (For the best views, try to snag an outside table).
Antonio's Pizzeria and Cabaret
230 Crescent Ave.
Avalon, CA. 90704
310-510-0008
 I made these pancakes using a recipe I've been wanting to check out for some time now. It comes from the Cook's Illustrated folks who tested out several different blueberry pancake recipes before publishing one they really liked. The description of these pancakes said things like, "fluffy", "tender", and "flavorful." I'd have to agree with them on the flavorful part, but my pancake certainly was not "fluffy" or "tender". Instead, they came out rather thin and more crepe-like but still quite light. I liked the taste of the pancake though and the fact that they were not dense or heavy was a big plus for me. And as the article states, the blueberries did not break or bleed into the pancake upon cooking, another plus. I'm still willing to give this recipe another try the next time I have blueberries on hand however. If you're inspired to give this one a try yourself, let me know if your pancakes turn out the same way the Cook's Illustrated testers did. I'd love to hear back!
 Just a quick post today because I'm going to visit my friend to bring her these Golden Vanilla Cupcakes. Once again, the recipe comes from the cupcake cookbook, Vegan Cupcakes Take Over The World, which has been one of my favorite go-to books for cupcake recipes lately. These cupcakes were light and airy and reminded me a lot of spongecake. The frosting I used was buttercream which added a bit of richness and lusciousness to the already yummy cupcake. It also gave me a chance to use my new pastry bag and practice making fancy schmancy swirls. What do you think?



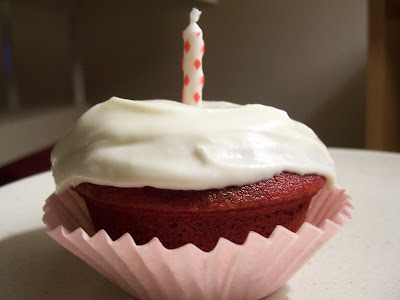 Tomorrow I will be turning a milestone age, and to celebrate the occasion, I baked some red velvet cupcakes. I decided on red velvet because the name itself conjures up images of pure decadence, don't you think? And I believe that decadence is something a girl ought to indulge in every once in awhile, especially on her birthday. Well, these cupcakes were not only decadent, they were also quite fun to make. The best part, aside from eating them, was adding the red food coloring and watching the batter turn a bright shade of crimson right before my eyes.
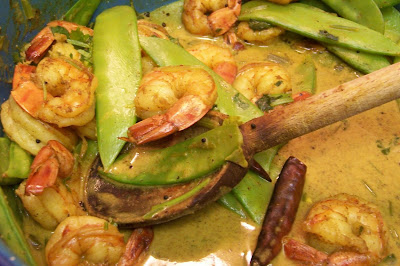 Okay, curry is not supposed to be pretty, is it? This shrimp and snow pea curry dish I made for dinner didn't look as photogenic as I would have liked for my post, but what the heck. It sure tasted good! This was perhaps one of the simplest and fastest meals I've made all summer and it got rave reviews from my shrimp-loving boyfriend. To make the job even more convenient, I used frozen jumbo shrimp that I bought at Trader Joe's. Simply serve this over some steamed white rice and you and your tummy will be happy.
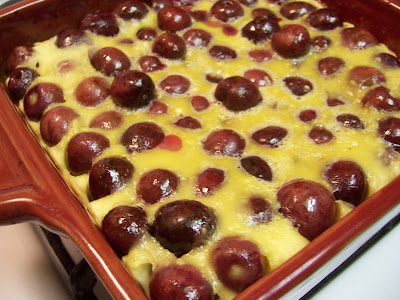 When I was around six years old, I remember going cherry picking with my parents and older brother. I can still recall how excited I was to pick my own fruit and how, at the end of the day, I was so proud of my big bagful of cherries. Never mind that it was sweltering hot or that there were bees swarming all round me. All I could do was joyfully pick cherry after cherry until both my bag and my tummy were stuffed. These days, I haven't been practicing my cherry-picking skills much. My local farmer's market and grocery store are where I mostly pick up my fruit now. Nevertheless, I was still able to find some luscious summer cherries which I thought would be perfect for this cherry clafoutis recipe. According to dictionary.com, a clafoutis (pronounced klah-foo-tee), is French for a tart made of fruit, baked in a thick, sweet batter. The fruit is traditionally cherries but really, almost any fruit can be used. I loved the ease of this recipe and the fact that it's actually a bit lower in fat was a big plus too. I found it in The Eating Well Dessert Cookbook and it takes very little time to put together. The clafoutis reminds me of a cross between a light bread pudding and a custard. Oh, and it's traditional to leave the pits in the cherries when you bake this, which is exactly what I did. Give it a try and enjoy!